


Quick Start Guide
This is a great starting point in getting the most out of AIR.
Add Endpoints
Once you open your AIR console dashboard it is a straightforward process. AIR supports deployment to endpoints running on Windows and Linux (DEB or RPM). There are two available ways to deploy: quick deployment (suggested) and manual deployment.
On the AIR dashboard, you can find straightforward instructions on how to deploy AIR agents to Windows and Linux machines.
Start an Acquisition
One of the core features of AIR is collecting evidence remotely. As of the latest version, it supports collecting 280+ evidence types out-of-box. You can customize your collection by using one of the existing "Acquisition Profiles" or creating your own profile with granular details.
1. Open an endpoint and click "Acquire"
Once you have added your endpoints you can start collecting evidence fully remotely. Click on any endpoint and click "Acquire".

2. Define your acquisition task
Give a name to your acquisition task, choose an acquisition profile (by default Binalyze AIR comes with pre-defined acquisition profiles). You can use options that are already provided in policies or create custom ones. Keep DRONE on as part of the post-acquisition task and click "Start".
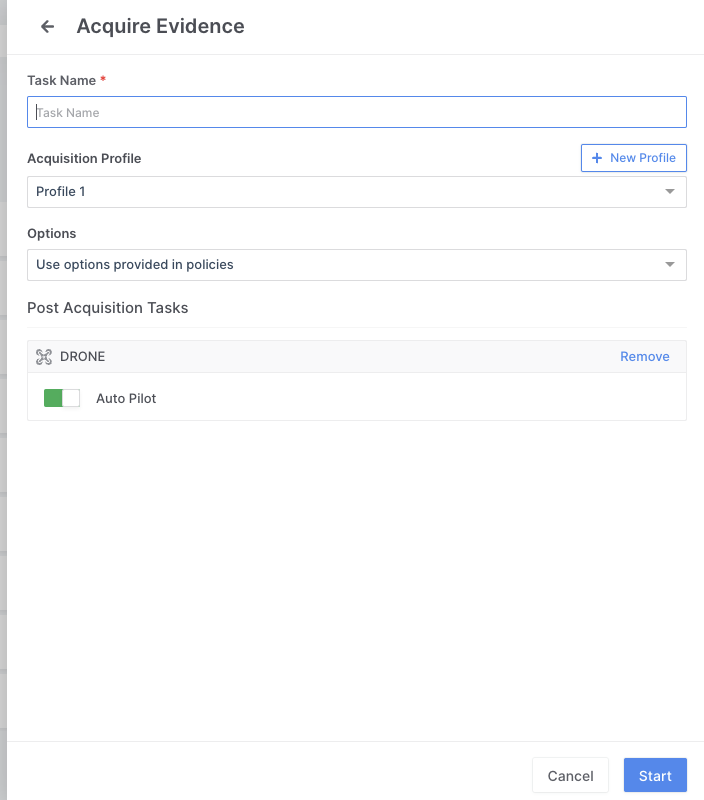
3. Post-acquisition task (DRONE integration)
DRONE, as part of the post-acquisition task, will analyze all the acquired evidence and create a report with findings. You can keep DRONE integration on auto-pilot or select specific analyzers as shown below.
4. Assign a task for multiple endpoints
There are two options available to assign a task to multiple endpoints:
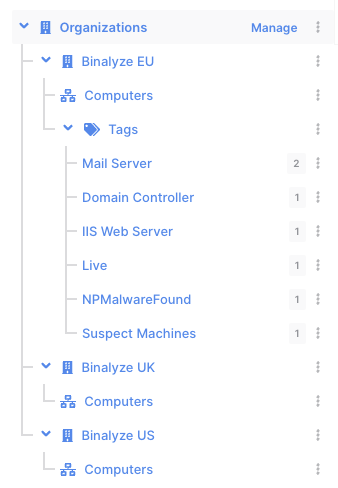
Assign to a tagged group of endpoints
Navigate to the Endpoints section. You will see a list of tags that contain grouped endpoints and you can assign an action by clicking on the three dots next to the tag name as shown below:
Select endpoints and assign actions
The other way is that you can simply select which endpoints you need for the investigation and assigned actions as shown below:
Reporting
1. Go to Endpoints Details
Click on the endpoint that you just acquired evidence from and click on "Tasks". Click on the eye icon and the report will open.
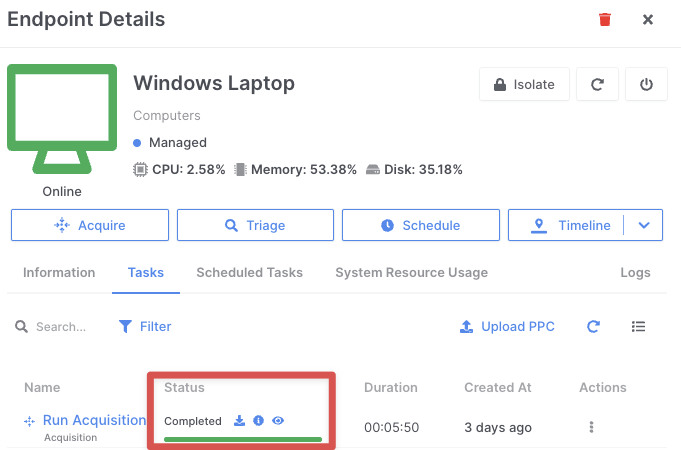
Once you open the report you will see the case essential information as shown below:
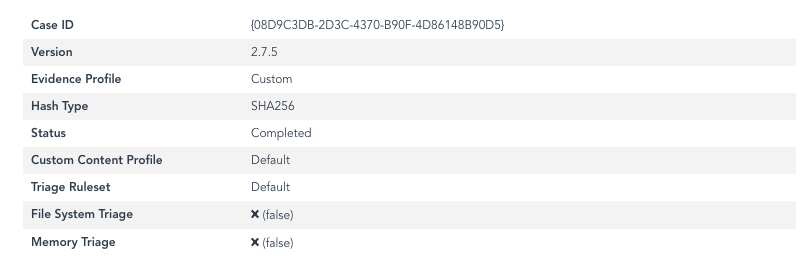
In the report menu, you will find a list of collected evidence types containing parsed data, as well as a DRONE section that contains highlighted findings.
DRONE works by tagging findings using 2 different scan categories:
-
Score
-
Verdict (dangerous, matched, suspicious, relevant, rare)
-
Dangerous - provided automatically by DRONE
-
Matched - if a specific keyword is provided, DRONE will tag those findings as matched
-
Suspicious- findings that are marked as suspicious warns the analyst to pay high attention to them
-
Relevant - findings that analysts should pay attention to them since they are marked as relevant to the investigation
-
Rare- findings that are not dangerous or suspicious but may be of interest to the investigation
Clicking any of the evidence types will display a table of parsed data. You can easily search, filter, view details, and bookmark items in these lists.

You can export the acquisition report as a PDF or HTML file.
Creating event timeline
1. Go to Timeline section in AIR menu
Navigate to the Timeline section and click on "+New Timeline".

2. Define Timeline details
Provide a unique name for this investigation and select a time zone so all events that AIR will collect from these endpoints will align and normalize to the selected timezone. Choose a number of endpoints that you want to extract events from, and click on “Create.”
By clicking create, you immediately assign a task to these endpoints to collect all relevant events and import them in a unified timeline. In around three to five minutes, the entire created timeline will appear in your AIR console.
Now you are ready to start acquiring and analysing evidence in your AIR console. If you need any help from our support team you can always reach out by visiting this link. Enjoy.